We built a new touch table last year. We had three main goals with this project:
- A larger table to give players a bit more room – especially for our 7+ player games.
- A 4K screen to make our game’s graphics look better.
- A table that is easy to disassemble and transport.
This project was quite a bit harder and took much longer than we had anticipated, but it is finally done!
 Hardware
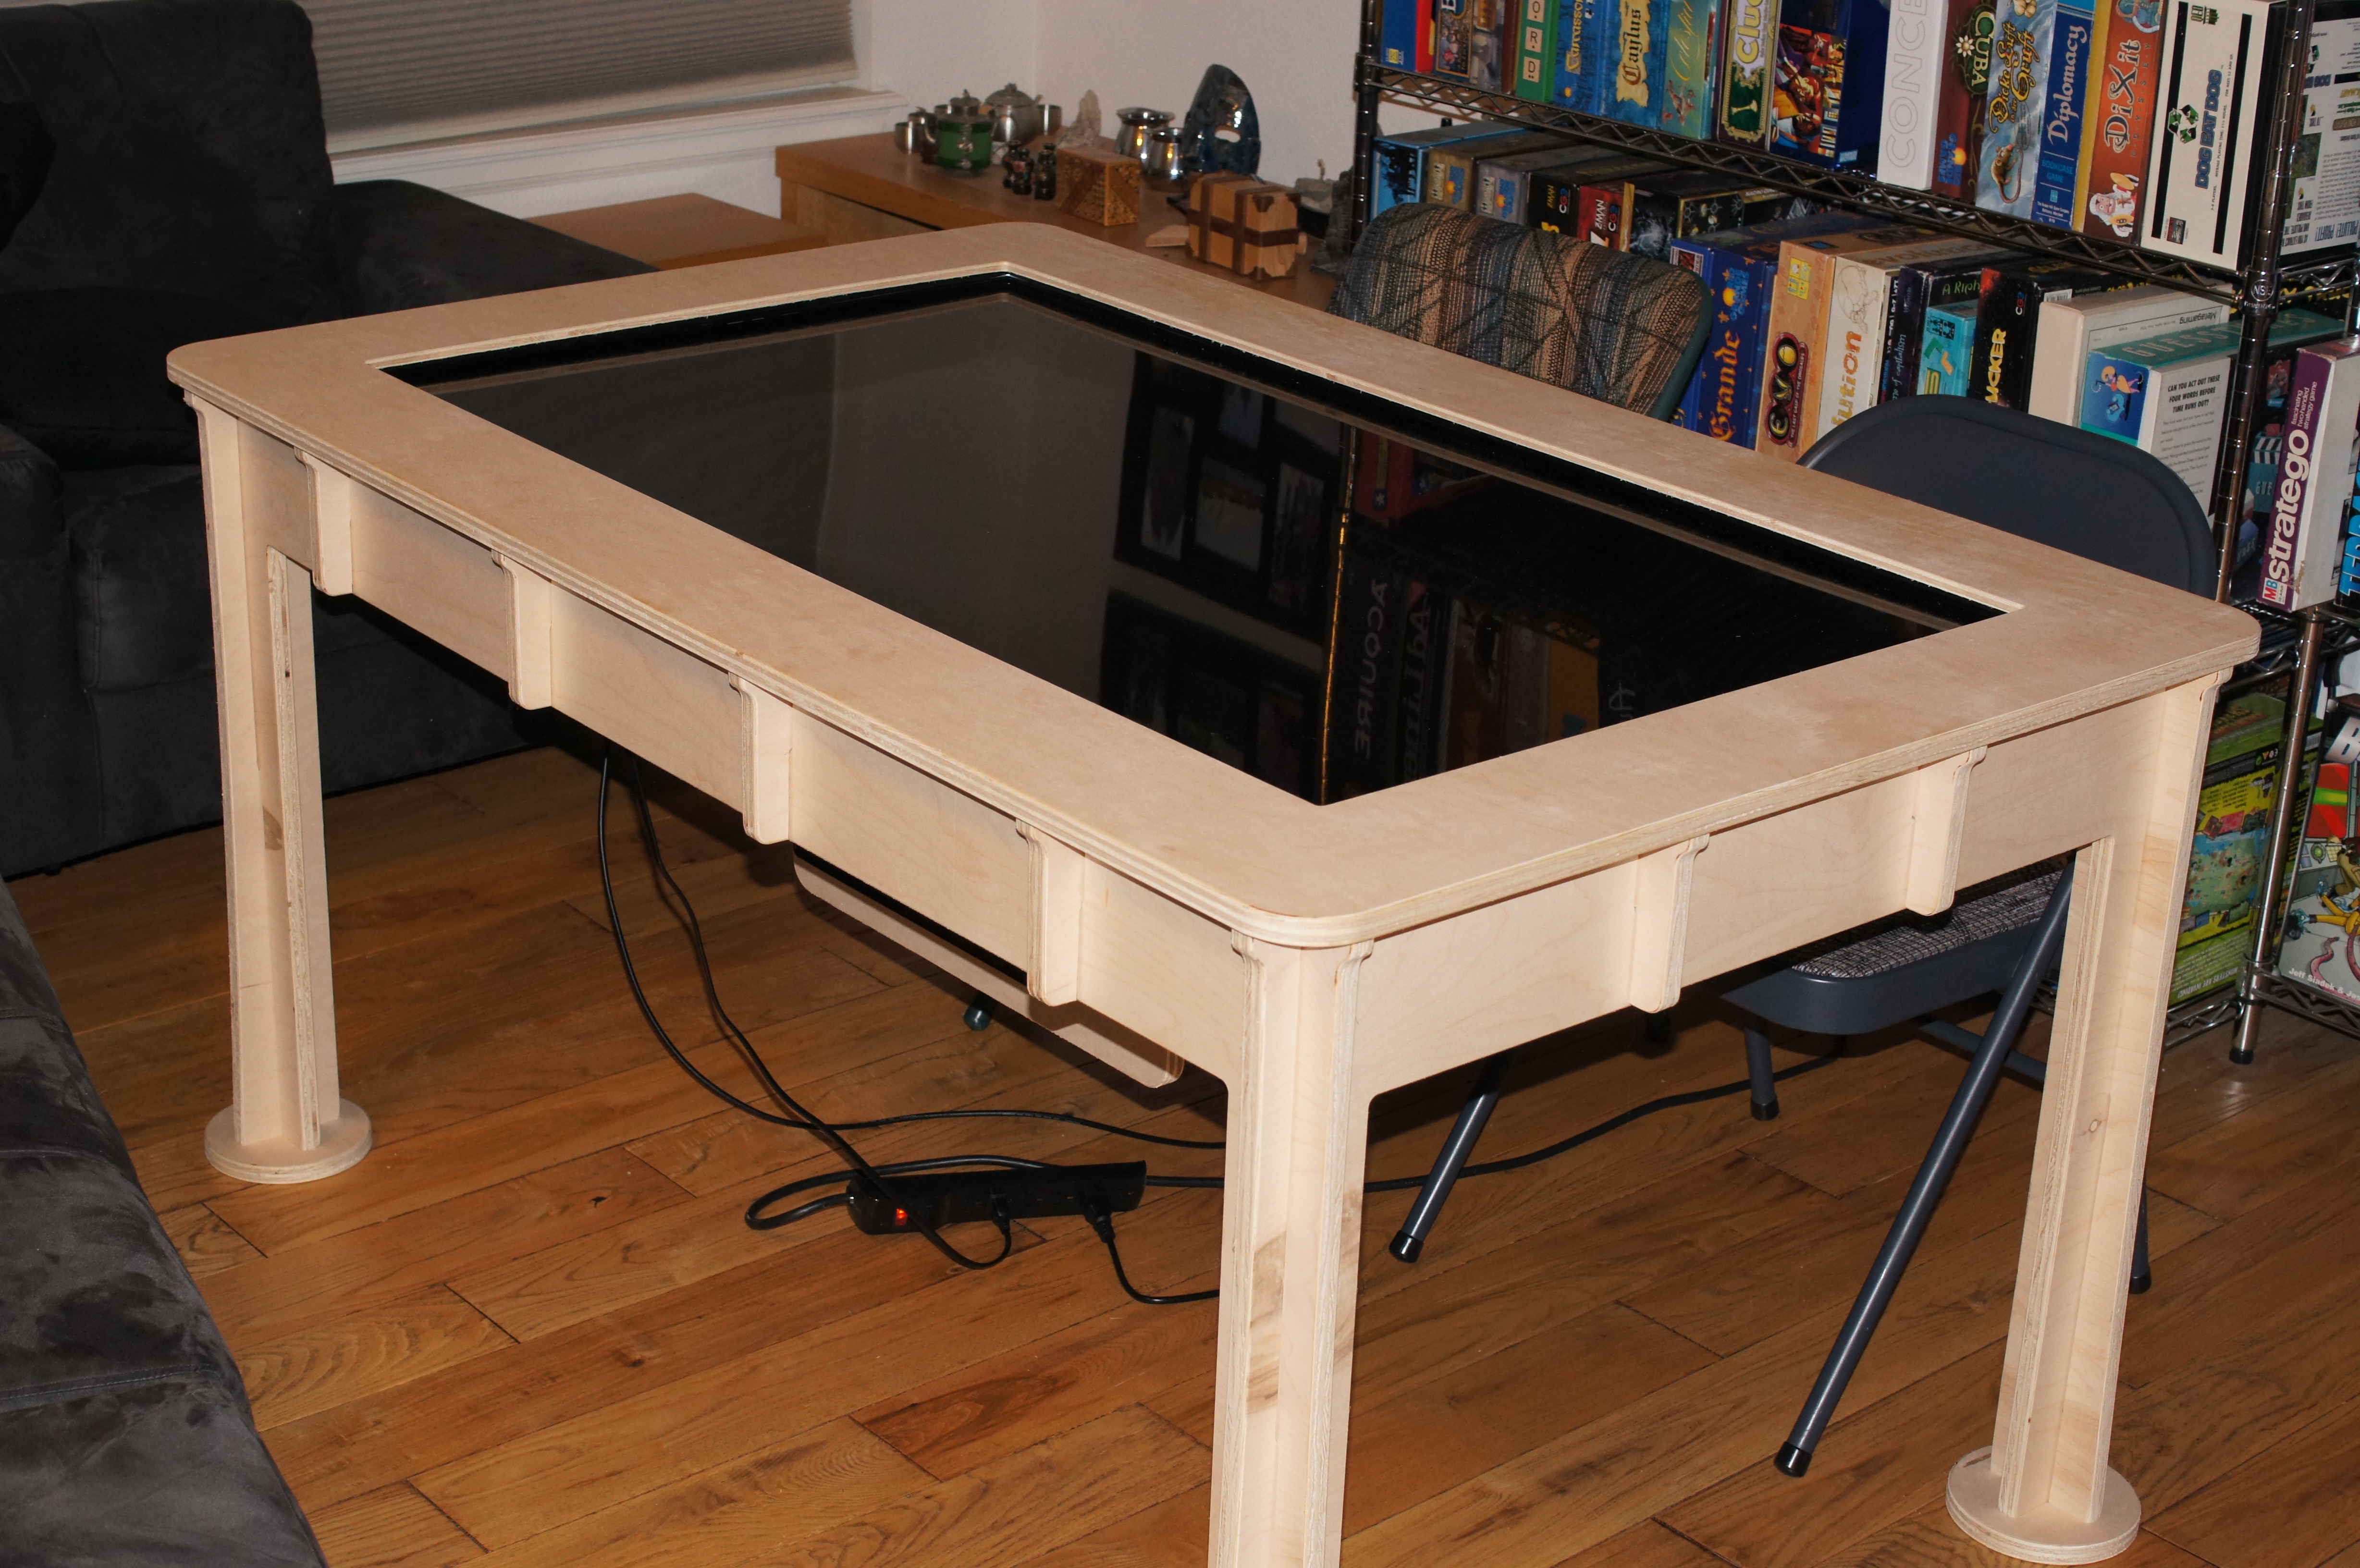
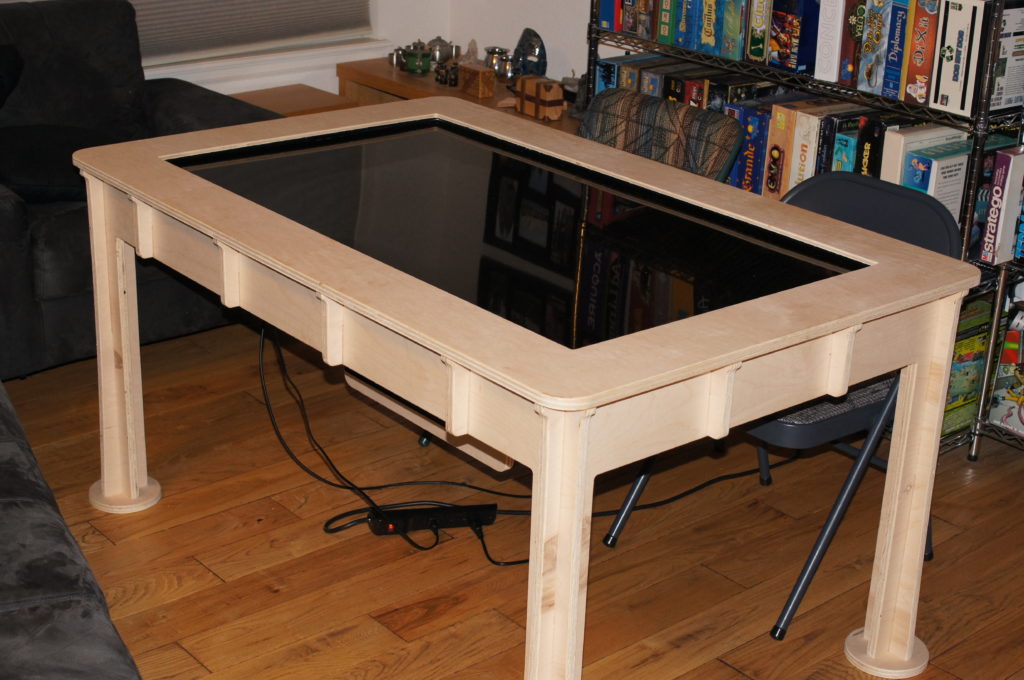
Our previous table was 46″ and we decided that the new table would be 55″ to give players more room, but not make the table so large that you couldn’t reach the center from the sides.
A touch table has four main parts:
- Enclosure (the physical table frame)
- TV
- Computer
- IR touch frame
Enclosure
The enclosure holds everything together and provides a table for everyone to sit around. We wanted an enclosure that was easy to take apart and looked like a piece of furniture. When we were at PAX with MesaMundi, they had flat-pack tables that met these goals and provided inspiration for our design.
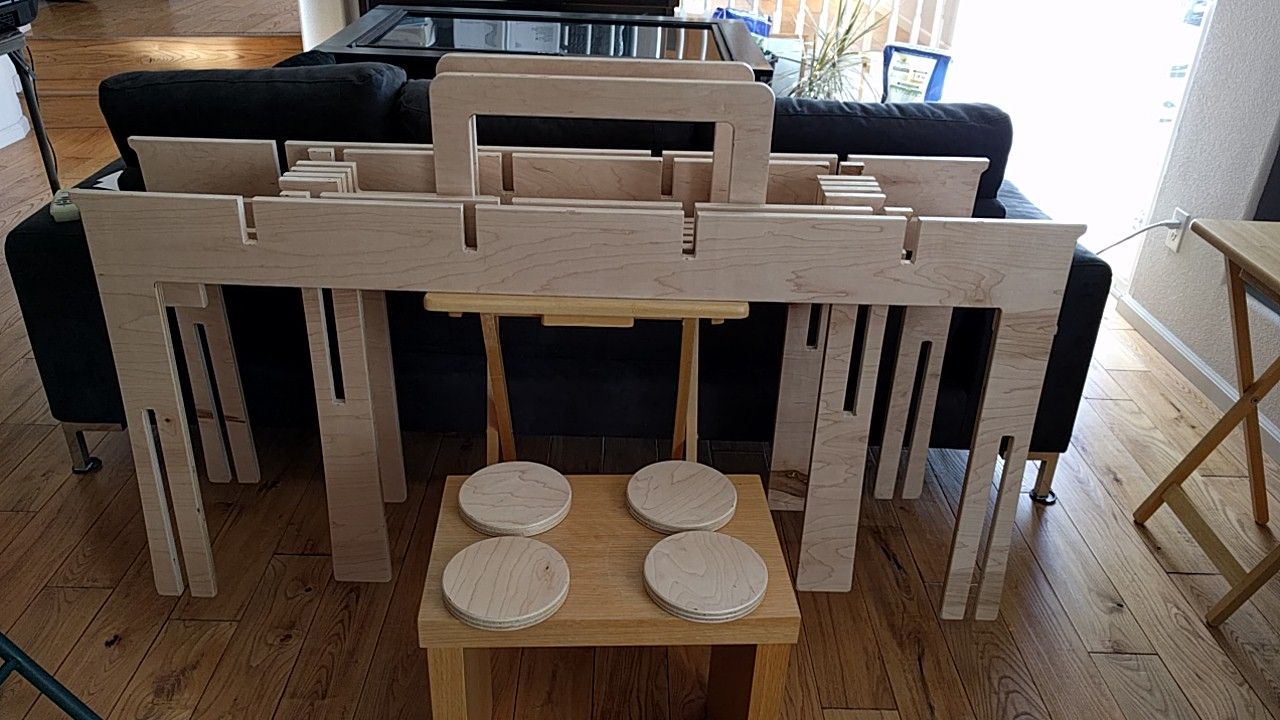
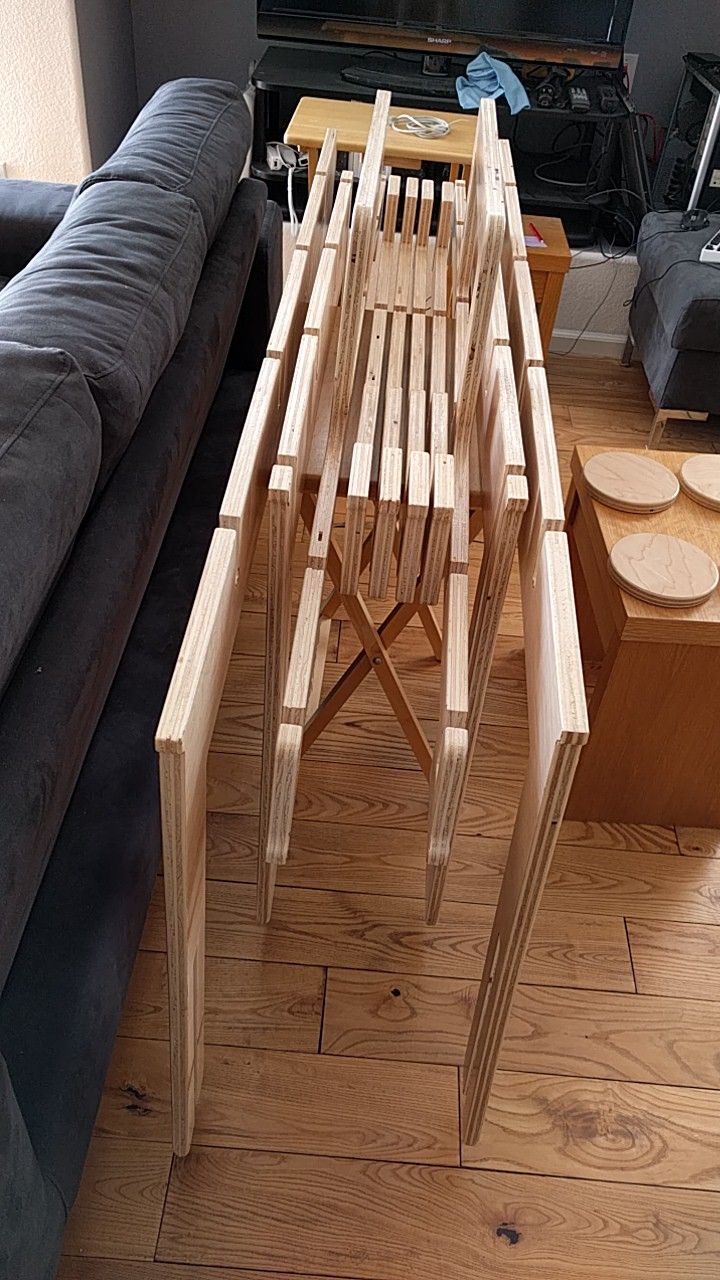
Bill put together a design and model for our table and we hired a local craftsman to build it. They made a CAD design of the table and used a CNC machine to cut particle board into the correct shapes.
We sanded and lacquered the pieces.

When taken apart, the pieces don’t take up much space:
TV
The TV that we chose is a Sony X700D. It is a 4K LED TV. While there are a lot of 4K 55″ TVs on the market, but we were looking for one that had a very shallow bezel, could display text well and had a good viewing angle. The TV for our first touch frame was ideal because it had no bezel and gorilla glass. Gorilla glass isn’t an option anymore (which makes sense as most people never touch the screen) and bezeless TVs were much more expensive.
Unfortunately, the thin bezel made the IR touch less responsive. Since the touch is picked up by the frame above the TV instead of by the screen itself, the closer the frame is to the screen the better. When people’s fingers approached the screen at an angle, the touch would register in the wrong spot. It was also very difficult to tap quickly. People would tap the screen, but if their finger didn’t rise far enough to clear the IR frame it wouldn’t register the tap.
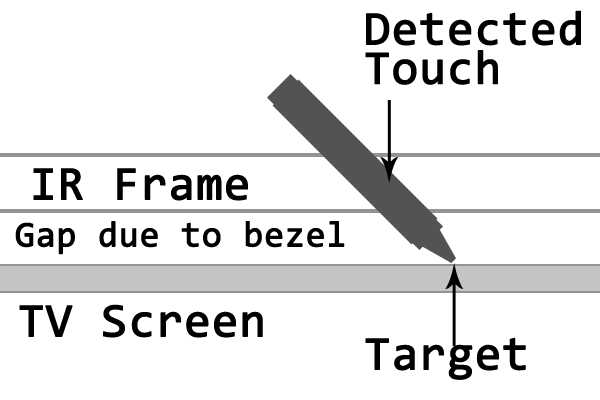
Fortunately we were able to remove the bezel from the TV. Without the bezel, the LCD isn’t attached to the TV at the edges, but that isn’t a problem since it is laying flat.
Computer
The computer was probably the easiest part of this project. We went with a micro ATX form factor which is a small desktop computer. The computer didn’t need to have a lot of CPU power or memory so we used a two core Intel G4560 CPU and 8GB memory. We did get a fast SSD so that games would load quicker, and a NVIDIA 1060 video card to run the games in 4K. We originally tried to use an old NVIDIA 660. It was fast enough, but the HDMI connection on the card didn’t have enough bandwidth and the reds looked blocky:

IR Touch Frame
Our previous touch frame was a PQ Labs G4. We’ve been very happy with it, so we bought the latest version of the PQ Labs frame, a G5 12 touch, for the new system. Unfortunately we had a very hard time getting it working correctly. It seemed to work fine when we tested it on our kitchen table, but when we put it on the TV we would get lots of extra “ghost” touches. The company that makes the frame has good support and they used a remote desktop app to log into our computer and calibrate the frame. This helped, but didn’t completely eliminate the problems. We continued working with them and they were eventually able to provide a frame configuration file that worked for our system.
They speculated that the problem was caused by not using a piece of glass under the frame. They may be correct, but our old setup didn’t use a piece of glass either.
Summary
Here is our final parts list and prices:
- TV – Sony 55” 4K X700D…………………………………………………………………….. $870
- Touch Frame – PQ Labs G5, 12 touch IR……………………………………………… $540
- Enclosure – Flatpack………………………………………………………………………….. $1080
- Computer……………………………………………………………………………………………… $665
- Intel G4560 3.5GHz 2 core CPU…………………………………………………………. $79
- MSI B250M motherboard………………………………………………………………….. $65
- 2x4GB DDR4 2133 memory……………………………………………………………….. $70
- NVIDIA 1060 GTX……………………………………………………………………………… $125
- Samsung 960 EVO 250GB M.2 SSD………………………………………………….. $128
- Windows 10 Home…………………………………………………………………………….. $90
- Micro ATX case, keyboard, Power supply, WiFi, cables………………….. $107
- Total………………………………………………………………………………………….. $3155
Resolution – HD vs 4K
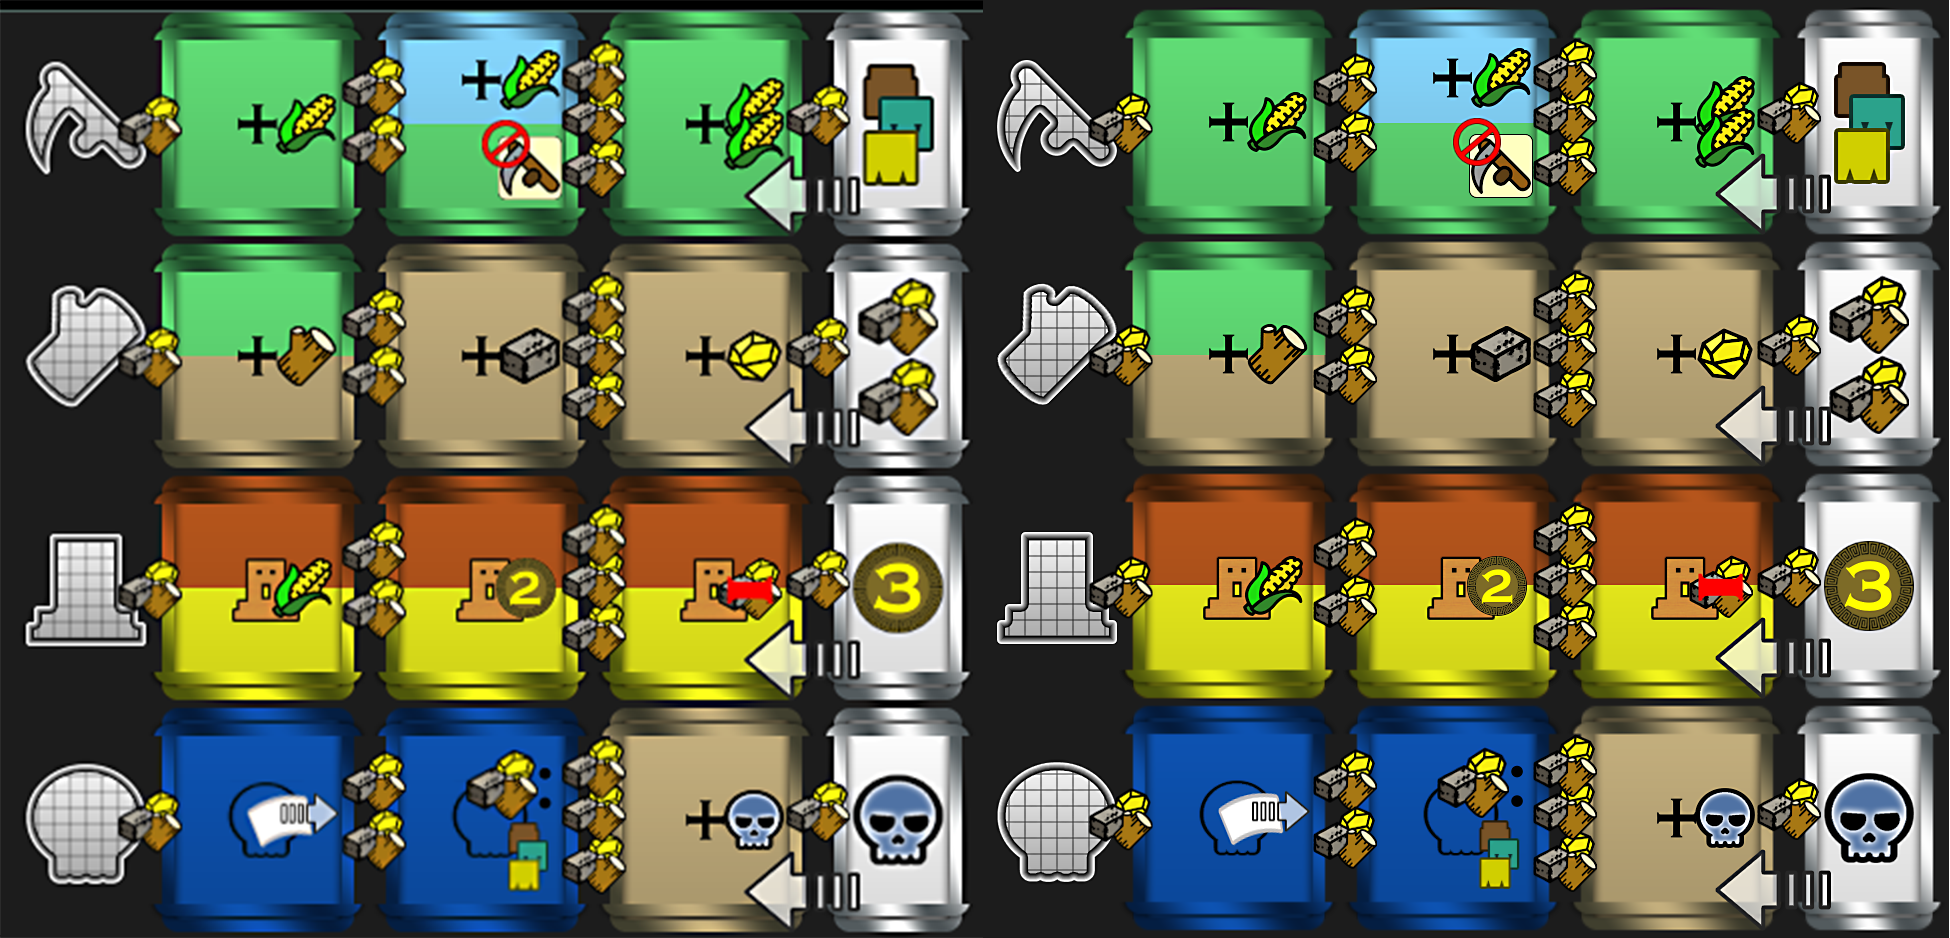
One of the challenges of converting boardgames for play on the touch table is not having enough space to display all the pieces. To fit everything that needs to be displayed onto the screen, I end up making the pieces and text smaller. These small pieces can end up looking a bit fuzzy and/or hard to read on a standard HD screen.
Here are some examples of the difference between what a game looks like on an HD screen versus a 4K screen. (click to see full size – HD on left or bottom)

 We still plan to make future games playable in HD. It will be tempting to use all the extra space to put more onto the screen, but we’d like to still support our old touch table, and having the constraint of limited space can lead to better designs.
One thought on “4K Touch Table project”