I have decided to stop using cloud services and move all my data back to my own computers. Part 1 listed all the cloud services that I use. Part 2 described how I plan to replace my cloud services with my own web server. Part 3 covered the process of setting up the web server hardware and software in more detail.
In this post I’ll describe securing my web server with SSL, setting up my own email server, and the backup system.
SSL
To install email and to connect to my ownCloud web server securely, I need to setup SSL on my web server.
Many websites use SSL to create a secure connection and prove their identity to their users. You use SSL whenever you connect with https to a website and get the little lock icon. SSL works via public key cryptography where each user creates a pair of keys – a public key and a private key. If a message is encrypted with one of the keys, it can only be decrypted with the other key. The public key is shared with everyone and it can be used to send a message that only the owner of the matching private key can decrypt. If the private key is used to “sign” a message, receivers can verify the sender because it will only decrypt with their public key.
On the internet, the websites have public and private keys. When you go to a website, your browser downloads their public key. Your browser then creates a one time, symmetric, encryption key, encodes it with the public key and sends it back to the website. All traffic is then encrypted with that agreed upon symmetric key. This system is nice because only the website has to have a public/private key pair. It allows the traffic to be encrypted, and you can verify who the website is, but they can’t verify who you are.
But there is still one problem. How do you know that the public key you are looking at really came from that website? There are quite a few ways that an attacker can intercept traffic from a web browser and send it to a fake website that is set up to look like the one you are trying to get to (known as “spoofing“). When a website gives you their public key, there has to be some way to trust that it is really their public key and not an attackers.
On the internet, all public keys are signed by a trusted third party. If your browser sees a public key that hasn’t been signed by one of these “Certificate Authorities”, it gives you a warning. All the major browsers are setup to trust the same hundred or so certificate authority companies. So, if you want people to trust that you are really XYZ Corp, you pay one of the authorities to verify that you are really XYZ Corp. Then they sign your public key so that browsers trust it.
But there are some serious problems with this system. If ANY of the hundred or so authorities is hacked (which has happened a few times), the hackers can issue themselves certificates to make it look like they are ANYONE. There is an individual certificate revocation system, and some of the “authorities” are no longer trusted at all, but those fixes take a long time to get out to everyone.
There was another option in the early days of the internet called a “web of trust”. Each user on the internet would decide which public keys to trust. This would just be the people you know personally. If a couple of your friends trusted a third party, you would trust them too. Software would look at the web of who trusts who to decide how much you should trust them. This arrangement has its own problems, and requires more work for each user of the internet. But it has one big benefit too. If everyone had a public/private key, we wouldn’t need passwords for websites.
I decided not to pay one of these companies to verify my certificate. Instead I will “self-sign” my public key. The only people who will trust that I am who I say I am are people who get my public key from me directly. This is fine for my purposes as I am not trying to communicate with strangers, and I can directly give my public key to anyone who would actually need it. So if you go to https://billandchad.com, your browser will tell you that the site’s security certificate is not trusted.
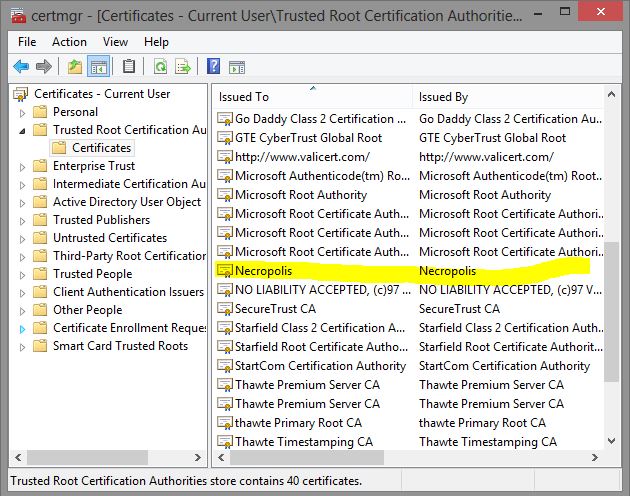
Creating a self signed certificate is pretty easy on Linux. On Windows you need to download the free and open source openssl program. Here are the steps that I used to create a certificate authority called Necropolis.
# Create the private key
sudo openssl genrsa -des3 -out /etc/ssl/private/necropolisRootCA.key 2048
# Use it to self sign our public key
sudo openssl req -x509 -new -nodes -key  /etc/ssl/private/necropolisRootCA.key -days 8192 -out  /etc/ssl/private/necropolisRootCA.pem
Since I created it, I obviously trust this key, so I install the public key on my Windows machine as a certificate authority. This is done with the Internet Properties dialog or the SSL admin tool. IE, Chrome and Firefox all use the windows certificate manager, so they will trust any certificates signed by this new authority.
Next I create the certificate for billandchad.com and sign it with the Necropolis private key.
#Create a private key
openssl genrsa -des3 -out billandchad.com.key 2048

#Generate a CSR
openssl req -new -key billandchad.com.key -out billandchad.com.csr

# Sign the CSR and create the certificate
sudo openssl x509 -req -in billandchad.com.csr -CA necropolisRootCA.pem -CAkey private/necropolisRootCA.key -CAcreateserial -out billandchad.com.crt -days 8196
With this private/public key pair for billandchad.com (signed by Necropolis), I can turn on SSL in apache.
sudo ln -s sites-available/default-ssl sites-enabled/001-default-ssl
# edit sites-available/default-ssl to point to the new certificates and set SSLVerifyClient to none
sudo a2enmod ssl
sudo service apache2 restart
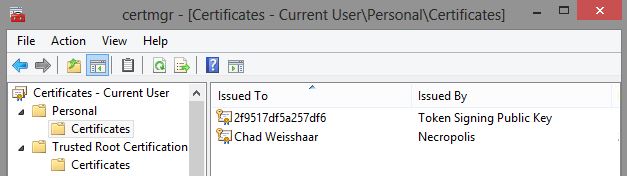
Next I create a personal key for my user account that I can use to send and receive secure and/or digitally signed email
# Create a private key
openssl genrsa -des3 -out cweissha.key 2048
# Generate a CSR
openssl req -new -key cweissha.key -out cweissha.csr
# Sign with Necropolis
sudo openssl x509 -req -in cweissha.csr -CA necropolisRootCA.pem -CAkey private/necropolisRootCA.key -CAcreateserial -out cweissha.crt -days 8196
# Package the signed certificate and private key together into a .p12 so that we can both encrypt and decrypt with it
sudo openssl pkcs12 -export -in cweissha.crt -inkey cweissha.key -out cweissha.p12
Then I install the .p12 file into the windows certificate manager. Since it has both my public and private keys, I can use it to digitally sign email and to decrypt email that has been encrpyted with my public key.
When I send a digitally signed email, it includes my public key. If the receiver trusts my public key – either because they already trust Necropolis, or because I call them and tell them I just sent my public key – then they can use it to encrypt email that only I can read. And, if they receive an email signed with my key, they know that it really came from me. It is easy to send an email that appears to be from someone else, so it is nice to have a way to verify the sender.
Like many people online, I have a lot of email accounts. I have accounts on MSN and Yahoo that I never use and a GMail account that I use rarely. I primarily use a few accounts provided by my web hosting company at chadweisshaar.com. I plan to move chadweisshaar.com to my own web server, and part of that move will be setting up my web server to receive and send email.
Linux comes setup with local email tied to your user account. Before the internet was popular, this was the only way to get an email account. You got a user account on an internet connected machine, and your email address became username@machinename. This is still how it works underneath all the web interfaces and POP/IMAP clients.
Making an Ubuntu machine into an email server that can talk to the internet means installing a Mail Transfer Agent. I picked Postfix.
sudo apt-get install postfix
sudo dpkg-reconfigure postfix
# I configured postfix as mail.billandchad.com
#   hosts= billandchad.com localhost Necropolis
#   addresses= 127.0.0.0/8 10.0.0.0/8 209.181.65.34 addresses
# edit /etc/postfix/main.cf to point to our cert and key
#   smtpd_tls_cert_file=/etc/apache2/ssl/billandchad.com.crt
#   smtpd_tls_key_file=/etc/apache2/ssl/billandchad.com.key
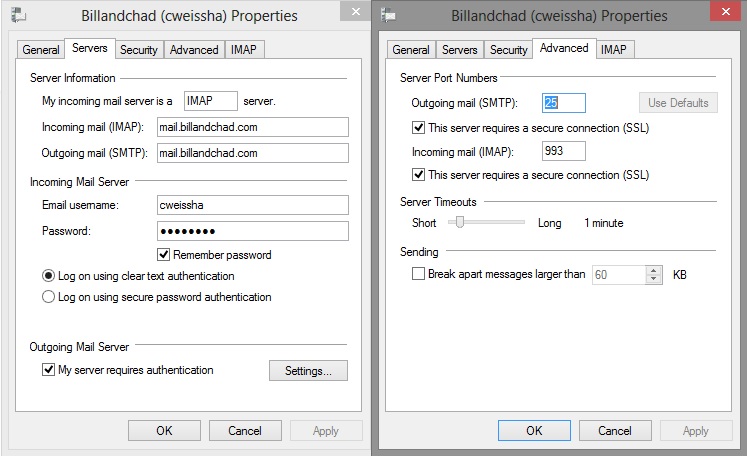
This allows me to send/receive mail to/from the internet on my web server. I can email in/out as cweissha@billandchad.com as long as I am on that machine. I’d like to be able to use my standard windows email client to send/receive email. To do this, I need to setup an IMAP or POP server. I picked Dovecot as my mail server. I configured it to only allow secure connections:
sudo postconf -e 'smtpd_sasl_type = dovecot'
sudo postconf -e 'smtpd_sasl_path = private/auth-client'
sudo postconf -e 'smtpd_sasl_local_domain ='
sudo postconf -e 'smtpd_sasl_security_options = noanonymous'
sudo postconf -e 'broken_sasl_auth_clients = yes'
sudo postconf -e 'smtpd_sasl_auth_enable = yes'
sudo postconf -e 'smtpd_recipient_restrictions = permit_sasl_authenticated,permit_mynetworks,reject_unauth_destination'
sudo postconf -e 'inet_interfaces = all'
sudo postconf -e 'smtpd_tls_auth_only = no'
sudo postconf -e 'smtp_tls_security_level = may'
sudo postconf -e 'smtpd_tls_security_level = may'
sudo postconf -e 'smtp_tls_note_starttls_offer = yes'
sudo postconf -e 'smtpd_tls_key_file = /etc/apache2/ssl/billandchad.com.key'
sudo postconf -e 'smtpd_tls_cert_file = /etc/apache2/ssl/billandchad.com.crt'
sudo postconf -e 'smtpd_tls_loglevel = 1'
sudo postconf -e 'smtpd_tls_received_header = yes'
sudo postconf -e 'smtpd_tls_session_cache_timeout = 3600s'
sudo postconf -e 'tls_random_source = dev:/dev/urandom'
sudo postconf -e 'myhostname = mail.billandchad.com'
sudo postconf -e 'smtpd_tls_CAfile = /etc/ssl/necropolisRootCA.pem'
sudo /etc/init.d/postfix restart
sudo apt-get install dovecot-common
sudo apt-get install dovecot-postfix
I also wanted to be able to use the address chad@billandchad.com instead of my actual username of cweissha. So I setup an email alias
sudo postconf -e "virtual_alias_domains = billandchad.com"
sudo postconf -e "virtual_alias_maps = hash:/etc/postfix/virtual"
# Add to /etc/postfix/virtual
#   chad@billandchad.com cweissha
sudo postmap /etc/postfix/virtual
sudo /etc/init.d/postfix/restart
With this setup, I can add an email account to Windows Live Mail as chad@billandchad.com with a mail server of mail.billandchad.com and my linux login credentials. I can then send and receive email to any internet recipient.
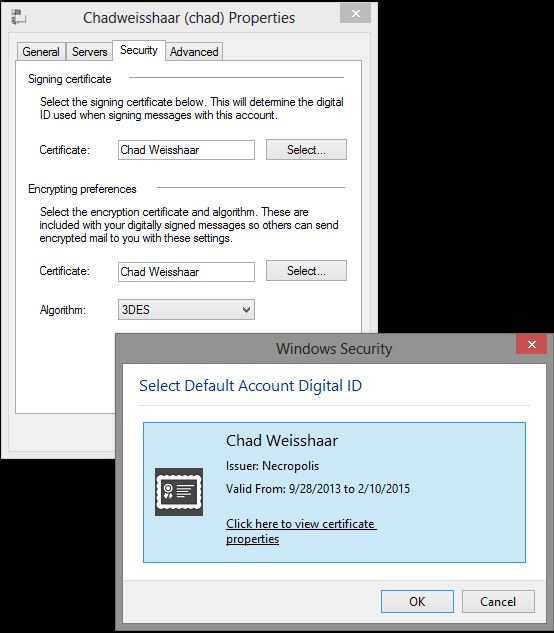
Finally, I can tell Windows Live mail to use my personal certificate when I send email:
Backup
Linux has quite a few options for backup. I chose to use the built-in rsync tool bolstered with some scripts for creating snapshots. The goal is to have frequent backups that act like a full backup, but to save space by using hard-links to the previous snapshot for files that haven’t changed.
First I setup a linux partition on my external drive. I already had a backup partition, but it was formated NTFS.
# unmount everything
sudo umount -a
# partition the disk (use commands t,1,83 w)
sudo fdisk /dev/sdb
# format the partition
sudo mkfs.ext4 /dev/sdb1
# label the partition
sudo e2label /dev/sdb1 LinuxBackup

#Update /etc/fstab with new UUID and type ext4
sudo mount -a
Next I setup some links and directories for the backup scripts which I got from Point Software.
sudo ln -s /backup /media/LinuxBackup
mkdir -pv /backup/snapshot/{rsync,Necropolis,md5-log}
ln -s /backup/snapshot/Necropolis /backup/snapshot/localhost
Install the three scripts into /backup/snapshot/rsync.
rsync-list.sh_ - Script for making md5 hashes of files for comparisons.
rsync-include - List of directories to include and exclude from the backups.
rsync-snapshot.sh - Main script that does the bakcups.
Running the rsync-snapshot.sh script as root makes a full backup of the system as /backup/snapshot/Necropolis/snapshot.001. Previous snapshots are rotated up a number. Snapshots are removed as needed for disk space, but the way that they are removed is to keep fewer and fewer backups as they get older.
I wanted a backup to be created every two days, so I setup the following cron job
sudo crontab -e
# 0 3 */2 * * /backup/snapshot/rsync/rsync-snapshot.sh