Assets
On the assets page, you will enter all the money that you have saved, any property that you own, or plan to buy, and any annuities or life insurance policies that you have.
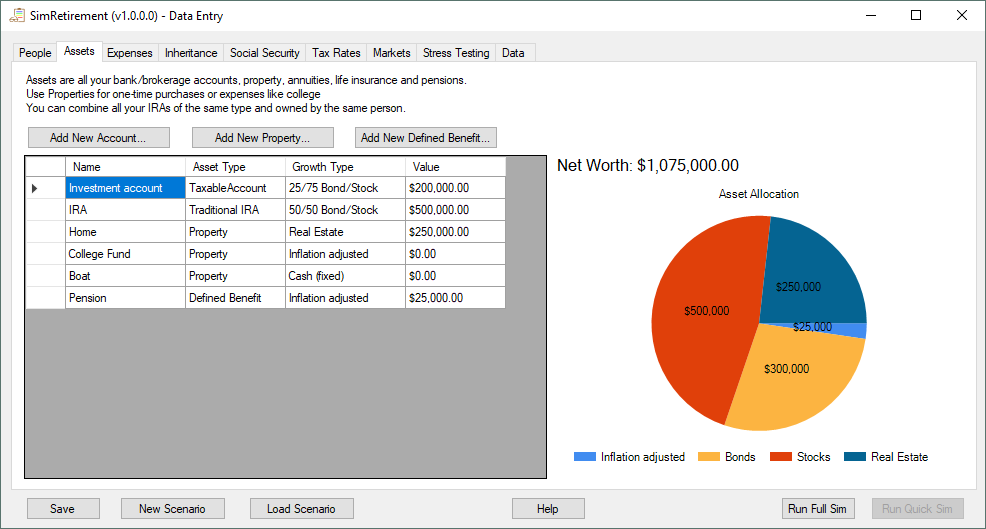
Accounts
Click the “Add New Account” button to add a taxable account, IRA/401K, HSA or Roth IRA.
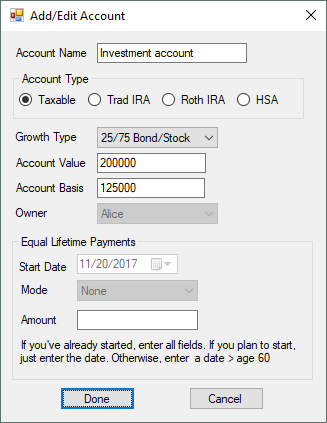
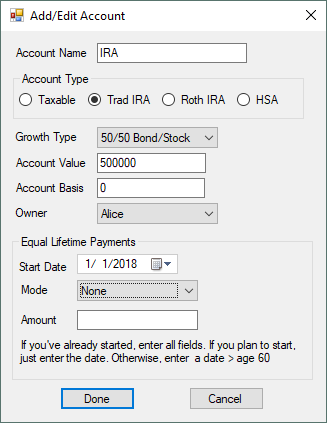
On the dialog that comes up, enter the name and type of account. If you have a 401K, use Traditional IRA since they have the same rules.
The “Growth Type” is the type of asset that is contained in that account. If you have an account with multiple asset types (beyond stocks and bonds), you can create two accounts. Enter the current value of the account and the basis. The tax basis of an account is the amount of money in the account that you have already paid taxes on. For a taxable account, this includes the amount you deposited and any dividends/interest. It doesn’t include any unrealized capital gains. For an IRA/401K the basis is zero. A Roth IRA works the same as a taxable account, but dividends and interest don’t count because you didn’t pay tax on them.
The Owner field only matters for an IRA/401K or Roth IRA and is used to determine the age of the owner. Once the owner is 59 1/2, money can be withdrawn without penalty.
The Equal lifetime payments option applies to Traditional IRAs and is a way to withdraw money from an IRA before you turn 59 1/2 without paying the penalty. It is often a good idea to setup equal lifetime payments to spread out the tax burden of taking money out of an IRA. If you have already set this up, enter a start date in the past and the mode and amount that you are withdrawing. If you plan to set this up in the future, just enter the date you will start withdraws and the simulation will calculate the mode and amount for you during the run.
Property
Click the “Add new Property” button to add any property that you own or plan to buy. This category includes:
- Your primary home
- Any other homes, land, or other items of value that you could sell to pay expenses.
- Any item that you want to buy during retirement.
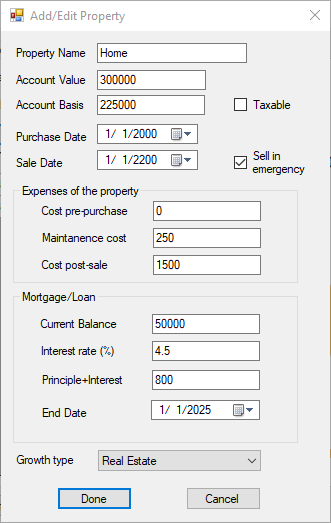
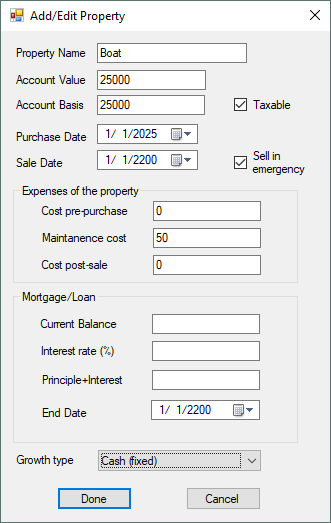
For something that you currently own
- The “Account Value” is what the item is currently worth
- The “Account Basis” is what you originally paid for the item (plus any improvements you have made). Click the taxable box unless this is your primary residence or the item isn’t taxable for some other reason.
- Set the purchase date to sometime in the past.
- If you don’t plan to sell this asset, set the sale date to a date far in the future (after you are certainly dead). If you do plan to sell this asset, enter the date you are going to sell it.
- Check the “Sell in emergency” button to allow the simulation to sell this asset to pay expenses.
- For the Expenses box: Leave “pre-purchase” blank. Enter any costs that you are paying to maintain this property (like property taxes, home repairs, etc) as a maintenance cost. You can enter a negative value to indicate that this property is generating income – like a rental property. Finally, enter any costs that you will have after you sell this asset. For example: If this is your primary residence that is sold to pay expenses, you will need to pay rent after it is sold.
- Enter any loan that you have on the property. The current balance is the amount you currently owe. The “Principle+Interest” is your loan payment (don’t include any other expenses being paid by escrow since these expenses will continue after the loan is paid off). The “End Date” is the date the mortgage will be paid off.
- Enter the growth type based on what type of asset this is.(It doesn’t really matter what this is set to if you don’t plan to sell it)
For something you are planning to buy
- The “Account Value” is what the item will cost to buy in today’s dollars.
- Leave the “Account Basis” blank. The simulation will fill this in for you when it buys the item.
- Set the purchase date to the date when you plan to buy the item.
- If you don’t plan to sell this asset, set the sale date to a date far in the future (after you are certainly dead). If you do plan to sell this asset, enter the date you are going to sell it.
- Check the “Sell in emergency” button to allow the simulation to sell this asset to pay expenses.
- For the Expenses box: Enter any costs you are currently paying in the “pre-purchase” field (this might be saving for the item). Enter any costs that you will pay to maintain this property (like property taxes, home repairs, etc) after you own it in the “Maintenance cost” field. Finally, enter any costs that you will have after you sell this asset. For example: If this is your primary residence that is sold to pay expenses, you will need to pay rent after it is sold.
- Leave the “Mortgage” box blank.
- Enter the growth type based on what type of asset this is. (It doesn’t really matter what this is set to if you don’t plan to sell it)
- Note: If the time comes to buy a property and you can’t afford it, the simulation will continue, but the result will be “Failed to fund goal” in the result summary.
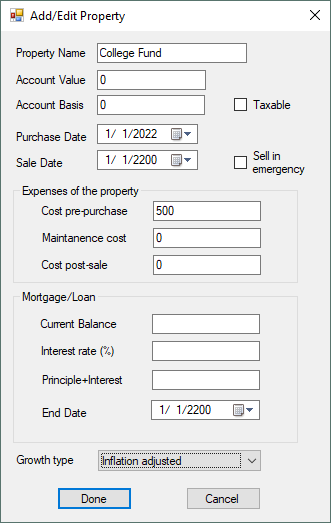
- Note: A property is how to plan for one-time expenses. If you want to pay for a child to go to college, you might create a “College fund” property with an amount and date, no sale date and don’t check the “Sell in emergency” box.
Other
The property category is very flexible and can be used for other things. You could setup an expense that starts/stops at certain dates to simulate saving for a purchase.
Defined benefit
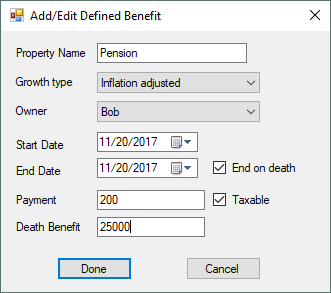
Click the “Add New Defined Benefit” button to add an annuity, pension, life insurance policy or any other asset that generates income.
The “Growth Type” determines how the “Payment” and “Death Benefit” change over time. For a pension this is usually “Inflation adjusted”. The “Cash (fixed)” setting should be used if the payment/benefit isn’t going to change. The “Owner” determines which person has to die for the “Death benefit” to be paid.
The start and end dates are used for an annuity that pays for a fixed interval. Instead of setting an end date, you can instead check “End on Death” which will cause the payments to stop when the “Owner” dies.
The Payment is the amount that this annuity will pay per month. Check “Taxable” if you owe income tax on this income. It will be treated as regular income (not capital gains).
The Death Benefit is the amount that will be paid upon the death of the “Owner”. The beneficiary is assumed to be the spouse or the owner’s estate if there is no spouse or the spouse is deceased.
Note: If you plan to work for a period during retirement, setup a defined benefit account over the period you plan to work and set the payment to your income (don’t include SS/Medicare withholding, but do include income tax withholding) and mark the income as taxable.
Next tab: Expenses